Monday, November 5, 2012

November 2nd – November 4th, 2012


FRIDAY

Well, how goes it everyone? Today was certainly not good for Devin and I (Eric) as the weather seemed to have a mind of its own bringing flurries, wet snow, rain, sun and even HAIL at one point!


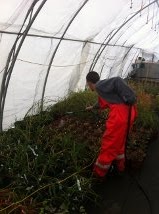
We started our day by first identifying the dead and broken branches located in the backdrop of the Hosta Garden, using pole saws, hand saws and secateurs to remove them as neatly as we could. In order to keep our work area neat, we piled the cut down brush in areas that we were already finished in order for easy and efficient removal later on in the day. After and although it was extremely wet and cold out, Lucas our on-site staff, Devin, I and even Mr. Pascoe came to help us as we hammered away at nails putting white poly on one of the two Hoop Houses we have here at Cuddys Farm. Once the hoop house was taken care of, we than started removing steel panels from an area in the Hosta Garden and placing them at the North end corner of the sea container. After that was done we thought we were in the clear just having to mulch all afternoon using the mower and trailer! Although due to the muck and very wet areas we could not dump mulch near our spreading area causing it to be quite difficult to get large mulch piles anywhere, just wheelbarrow loads. The area was also quite larger than what we had expected so we could only finish mulching the one half of the Hosta bed and the pathway amongst them.

SATURDAY

Up for a bright and early rainy morning on Saturday, Devin and I arrived to Cuddys with a new list of tasks for the day while still continuing to deal with mulching. Unfortunately, the ground was still absolutely flooded and mucky everywhere so we were still having a hard time dumping the trailer. Splitting up, Devin continued the toughest task of dumping wheel barrow loads all day, while I removed the leaves from small perennials in the Magnolia Garden, cut back Hostas using secateurs and shears, pruned the dead out of trees with a pole saw in the Woodland Garden, power blew larger leaves off of the plants as well to avoid smothering and bailed water out of the water trough using a bucket.

SUNDAY

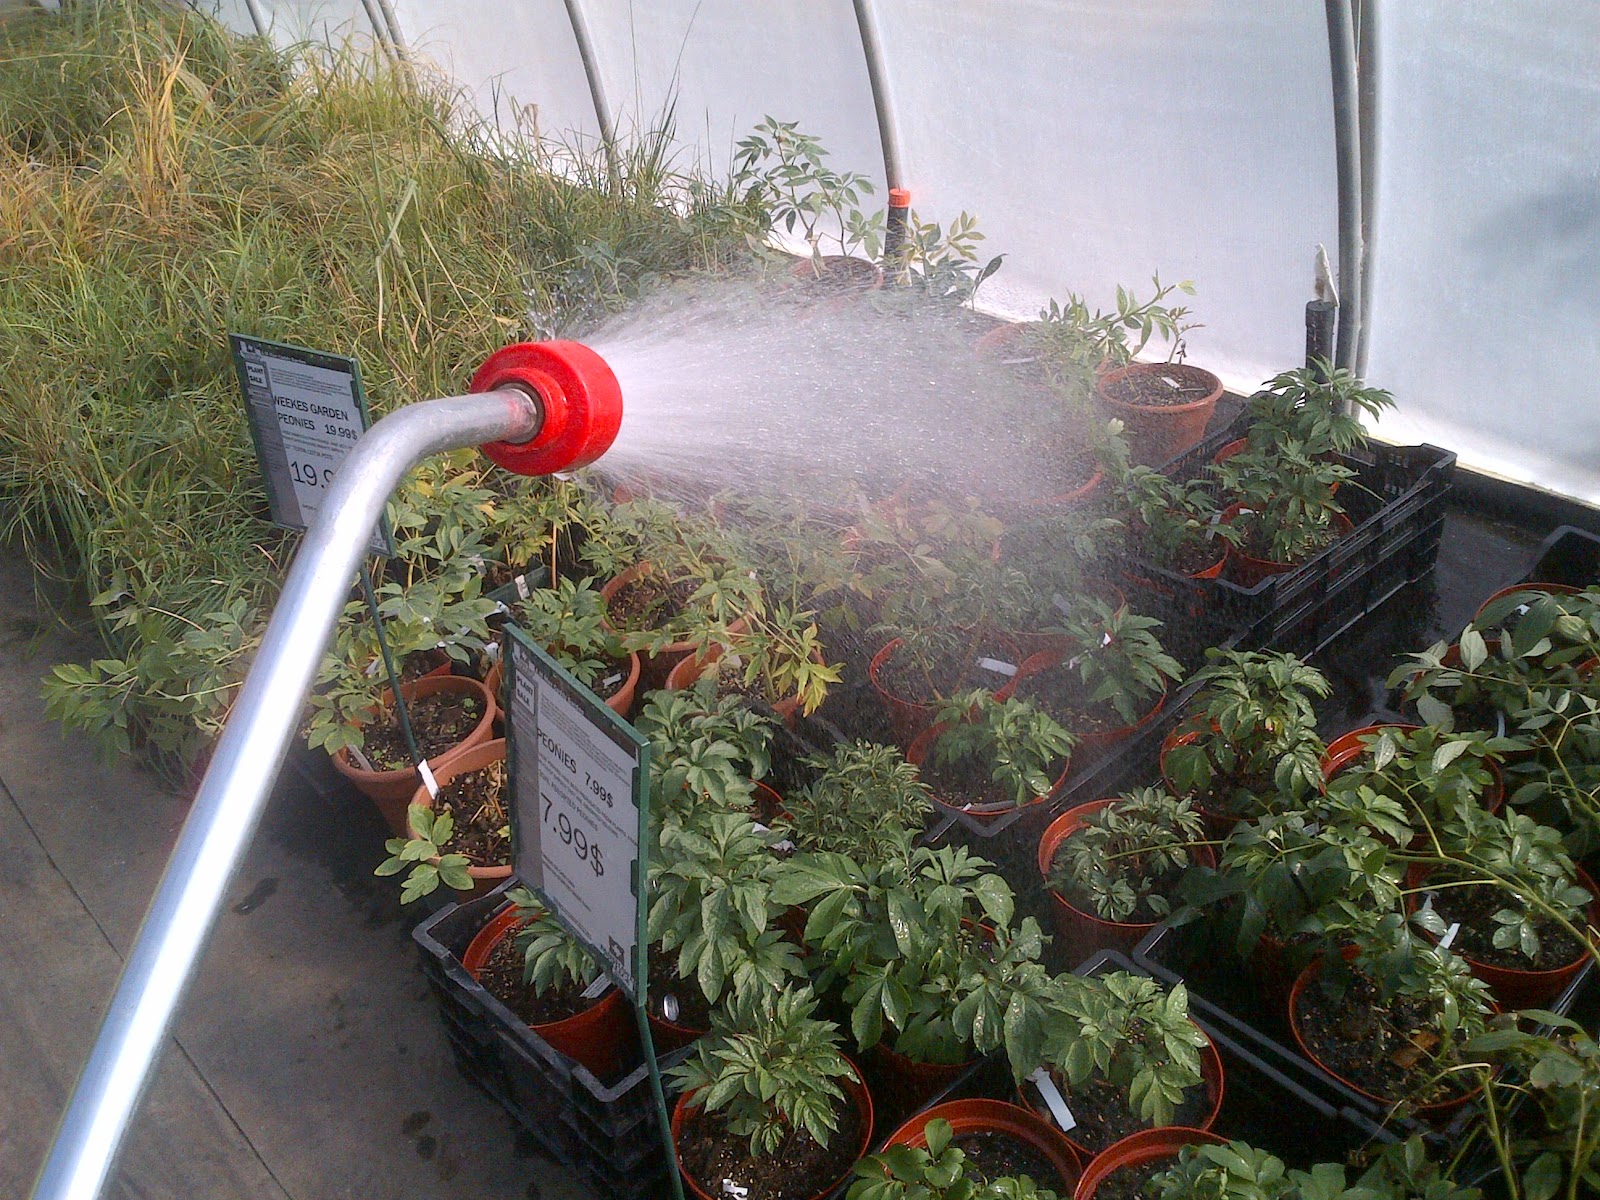
Another bright and early day, today consisted of no rain although the ground was still fairly wet and we both were still unable to get the trailer where we wanted in the Hosta Garden. At this point we had become one with the pitchfork and wheel barrow and dumped loads all day, spreading with a hard rake once enough was down. We hauled any debris or limbs that were still piled up under the trees and moved them to the North West corner which is to be chipped up into mulch later on. Devin continued to dump wheel barrow loads of mulch for an hour or so as I completed watering the hoop houses and blowing off all hard surfaces on the Cuddys property. Mulching was not completed as a small area is still left but all piles were spread and cleaned up before we left the site. All tools as well as machinery we had used throughout the weekend was power washed off before we left.

Plant Profile

A plant we learned was Heuchera ‘Mint Frost’.

Common name: Mint Frost Heuchera or Mint Frost Coral Bells

Family: Saxifragaceae

USDA Hardiness: 4-9

Canadian Hardiness Zone: 5

Height: 20 – 35cm

Spread: 30 – 45cm

Flower: Bell shaped white flower that can reach up to 24 inches high and it is not fragrant. Blooming early summer, mid-summer and late spring.

Leaf: Light green, silver or variegated including light green with a rose tinge colour. Dense, crinkled lobed leaves with the flower emerging above it.

Bark: Dark/light green stems

Colour: Light green, silver or variegated colour.

Fruit: The fruit is not ornamentally significant.

Propagation: Division

Habitat: Huerchera ‘Mint Frost’ is of horticulture origin.

Shape: Mound of dense foliage with creamy white flowers emerging from middle.

Growth: Medium

Cultivation: Grows in both full sun and full shade. Prefers moist conditions and should not be let to dry out. Covering around the plant with a thick layer of mulch will protect root zone in winter. Somewhat tolerant of urban pollution.

Pest: Japanese beetles, Root and Vine weevil.

Diseases: Anthracnose, Gray Mold, Bacterial Leaf Spot.

Notable Specimens: A.M. Cuddy Gardens, Strathroy, Ontario.


Bibliography


http://www.perennials.com/plants/heuchera-mint-frost.html

http://search.millcreeknursery.ca/11050005/Plant/3610/Mint_Frost_Coral_Bells

http://suite101.com/article/heuchera-for-the-garden-and-containers-a126833

http://www.daytonnursery.com/encyclopedia/perennials/heuchera.htm


Monday, October 29, 2012

Always more to do before the snow flies!

Blog Entry October 26-28, 2012


Cassie, Sijia, and Miranda reporting from a cold and wet Cuddy Gardens this weekend. Never the less there is always work that needs to be done. Preparing for winter is crucial this time of year when timing is everything.

Dividing perennials such as Pulmonaria saccharata (Lungwort), Colocasia esculenta (Elephant Ear, or Taro) and Pennisetum (Fountain Grass) before the frost, for next summer’s annual plant sale. It’s very important to stake young saplings to help them grow true to form, encourage strong trunk development, and protect them from bending in the wind (we used bamboo stakes).


Winterizing newly planted trees to ensure a proper start to their growth and survival. Using tree wrap, you start at the base of the tree and wrap upwards to ensure water run-off and prevent rotting of the bark (tree wrap also helps protect trees against south west disease); the tree wrap is tied at the top with Jute (a vegetable fiber that deteriorates after a couple years); next the plastic tree guard is placed around the base of the tree to prevent little critters (rabbits, voles, beavers, deer, etc.) from nibbling during the winter months; finally as added protection against critters a wire cage is secured around the perimeter of the tree.


Expanding Cuddy Garden’s Rose Garden!!! Compost was distributed in newly expanded rose beds and then rototilled to mix the nutrients into the existing soil.


The soil was then compacted back down to finished height, which is mounded up in a small hill shape to aid water run- and the beds were beautifully edged. Now it’s ready to be planted.


Finishing touches. Adding finishing touches to garden beds makes them look complete. It’s amazing the difference between a bed that is not mulched or edged with one that is. Spreading mulch evenly along one bed helps decompose those essential nutrients into the soil over the winter months and makes spring planting easier.


Edging another bed to separate turf from garden helps control weeds in the spring.


Plant Profile


Botanical Name: Amsonia hubrichtii

Common Name: Arkansas Bluestar

Family: APOCYNACEAE

Category: Perennial

Canadian Hardy: Zone 6 (possibly 4 in microclimate)

Height: 30 cm – 90 cm

Spread: 30 cm – 90 cm

Growth habit: Round mounding

Landscape Use: Golden Fall colour, mounding, perennial gardens, borders, flowering, attracts butterflies.

Light: Full sun to part shade

Soil: Medium moisture to well-drained soil

Flower: Blue, small trumpet shaped flowers in clusters at top of stem. Blooms late spring/early summer.

Leaf: Narrow, pointy leaves cover the stem all the way around, pointing outwards. Green in spring/summer, bright gold in fall (excellent fall interest), stalks remain throughout winter.

Habitat: Native to North America

Propagation: By seed in spring or fall and division in spring.

Pests: Deer resistant

Other information: Drought tolerant once established. Very low maintenance plant.

Notable Specimen: A.M. Cuddy Gardens, Strathroy Ontario (Perennial Border)

Sources:

Fine Gardening: http://www.finegardening.com/plantguide/amsonia-hubrichtii.aspx

State-by-State Gardening Newsletter: http://statebystategardening.com/state.php/newsletters/stories/perennial_plant_of_the_year_arkansas_blue_star/

Monday, October 22, 2012

Cuddy’s Blog- October 19, 20 & 21, 2012


Candice Lapointe and Ashly Haagsman


Hi Everyone,

It’s Ashly and Candice here. Wow, what a busy weekend at the Cuddy Gardens. We are getting the plants all ready for winter and there are a lot of plants to prepare!

We worked on the beautiful patio and prairie garden area of the Cuddy Gardens. We went through and cut back all the foliage of the Hostas, Iris, Phlox, and Miscanthus. This prevents damage occurring to the plants and garden from the weight of the snow. It also can prevent pest and disease from affecting the plant from sitting on thawed soil in the spring. Many plants benefit from fall clean up and winterizing.

We mulched the beds 3-4” thick to keep weeds away in the spring, more insulation for the plants over the winter and for nutrients to the soil as it decomposes. But a mulched bed doesn’t look complete unless it is edged first! So we edged the outside of the prairie border, to complete the serpentine shape and design of the bed.

a freshly mulched bed, accented by a sculpture and some beautiful Geranium ‘Blogold’ -Blue Sunrise Geranium


 We cut back some Geranium and other low growing perennials to define the walkway and to ensure in the spring, when new growth occurs, there is still a path to walk on. We did the same to the Vina minor and Hedra helix on the patio.


The patio after the fall cleanup has been completed.


  Some other Plants that required some over wintering were the tropical plants that normally find home in our fish pond on the patio. We moved the Colocasia esculenta and the Cyperus alternifolius into a water container in the pool room. The plants are marginally hardy to our area (Zone 6), so overwintering them further encourages another successful year.

We are also doing some renovations to our already expansive and beautiful rose garden. We are extending both central beds in the garden. We used a sod cutter to remove the turf and rototilled the bed to loosen the soil.


Candice cutting the sod with the sod cutter to expand the rose bed.


We still have lots of work to complete the winterizing of the gardens, but it is coming along beautifully. Any time of the year the A.M. Cuddy Gardens are a magnificent sight to experience the wonderment that is plants.


Plant Profile
 

Fothergilla gardenii


Dwarf Fothergilla


Candice and Ashly’s Opinion

Is an excellent specimen plant with interesting fragrant apetalous flowers in the spring. Vibrant autumn colours, and lush dark green foliage in summer.

Botanical Information

Family

-Hamamelidaceae

Genus

-Fothergilla

Species

-gardenii

Category

-Woody

Type

-Deciduous Shrub

Origin

-Fothergilla gardenia originated in northeast area of North America and was named after John Fothergill. He was an English doctor whose personal botanical garden showed a specific interest in American plants.

Details

USDA Hardiness

- 4-8

Canadian Hardiness

- 5

Temperature

- (-)29-(-)26C

- (-)20-(-)10F

Height

- 1m

Spread

- 1m

Description and Growing Information

Landscape

-Planted mostly as a specimen for its interesting, bottlebrush like, fragrant flowers, which appear in late spring, prior to any foliage emerging. Fothergilla grows best in moist soils. The best conditions to plant Fothergilla in to obtain the best autumn colour are in full sun and well drained soils. These conditions cause a brilliant orange, red, and/or yellow leaf at its most vibrant.

Propagation

-Fothergilla gardenii has a two valved capsule that ripens in September. This capsule should be collected before dehiscence occurs. Place the capsule in a brown paper bag and store in a warm, dry place until the capsule splits open and release the seed. The seed requires a six month warm period to germinate. Locations such as a window sill or greenhouse bench will allow fluctuation between night and day temperatures which is ideal. Fothergillas may also be propagated from young shoots in June and July.

Habitat

-Fothergilla gardenii thrive in swamps of southeastern North America. It does best in full sun and moist, well drained soils.

Shape

-Has a neat, weakly rounded, yet slender dwarf form.

Growth

-Slow

Flowering Period

-April to May

Cultivation

-Requires full sun to produce intense autumn colour and large amounts of flowers. May be grown in partial shade but it will not have as intense of an autumn colour. It prefers soils that are well drained, moist and high in organic matter.

Pests

-Is resistant to most pests and diseases.

Notable Specimens

-Located at, The A. M. (Mac) Cuddy Garden, Strathroy, Ontario, Canada.

ID Characteristics

-Gardenii’s most notable features include the bottle brush like, petal-less flowers, which bloom before the appearance of leaves. Leaves are shallowly toothed, and obovate with intense autumn colour, ranging from red, yellow and orange on the same leaf.

                                                     General Description

-Weakly rounded dwarf shrub with interesting dense apetalous flowers. Has a deeply veined leaf, with an intense autumn colour.

Flower Description

-Flowers are no bigger than 5cm long. Flower is described to be a bottle brush apetalous.

Bark Description

-The bark is a tan colour but is not as notable as the rest of the plant.

Leaf Description

-Leaves are alternate, shallowly toothed, and deep veined. They are 4 - 5 cm long and 2 - 5 cm wide. The petiole is 9 mm in length.

Texture Description

-Has a thick density and medium foliage texture.

Colour Description

-Interesting white flowers. Has an intense red, yellow, and/or orange autumn colour that can appear on the same leaf.

Bud Description

-The buds on Gardenii can be obvate or oblong with larger terminal buds. Buds have two large scales that are shed off early. Flower buds are 4 - 5 mm around and pear shaped.

Fruit Description

-The fruit is 2 cm long, with two valved capsules that are green to brown in colour.


http://plantfacts.osu.edu/pdf/0246-452.pdf

http://edis.ifas.ufl.edu/pdffiles/FP/FP21400.pdf

http://arnoldia.arboretum.harvard.edu/pdf/articles/1737.pdf

http://www.delmarlearning.com/companions/content/0766836347/pdf/Bridwell_165.pdf

http://www.hort.uconn.edu/plants/f/fotgar/fotgar1.html

http://www.everchanginggarden.ca/myplants/2011/11/03/fothergilla-gardenii-dwarf-fothergilla/

http://plants.usda.gov/java/profile?symbol=FOGA


Monday, October 15, 2012

Winterizing

Oct 14th,2012 Greenhouse Blog Josh T, Aaron S


The team arrived at the A.M Cuddy gardens on Friday October 12. Shortly after they arrived, they got their weekend briefing, including tasks that had to be completed during the weekend. Seeing as their group was the last one to do the practical at Cuddy’s they had a lot of work in and around the green house to complete. As usual the group picked the most time consuming tasks to complete first. The first task was to remove the shade cloth from the poly house and store it in the sea can. Next was to turn the electric blower fan off and deflate the poly, so that it would be easier to drape the white poly over the gable and around the hoops.


After the white poly was up and stapled the fan was then turned back on. the next job was then to pot up all of the Hemerocallis ‘Stella De Oro’ into 1 gallon pots, after all of the plants were potted they were then labeled by stapling the made up labels to the pot itself. Then they were placed inside the greenhouse. The next task was to cut the foliage back on the Sedums and divide their root balls. After the root balls were divided they were potted, labeled and placed inside the greenhouse similar to the Hemerocallis.


The next day was inventory day, all plants were counted ; classified by Genus, Species, Cultivar, Pot size and quantity. While one team member recorded information the other would sort through the plants. Relaying the information to the recorder.


The sedums were the next task to complete (described previously). After that was finished the team closed the greenhouse doors for the night to prevent frost damage to the plants. The next day the team cleaned up all pots and debris laying around the potting station. Then the team potted up the Iris and the Salix cutting into 1 gallon containers. The next thing on the list was to organize the floor space in the greenhouse, moving the Hemerocallis outside into the cold frame and the Iris into the greenhouse. Next all similar plants were moved into blocks so that they could receive the same culture. Next the plants were watered.


Finally a thorough cleaning of the greenhouse was completed and the doors were once again shut for the weekend to protect from frost damage.

Nick and Mark's weekend

Maintenance Practical October 12th -14th


Hey everyone! Nick and Mark are here at the Cuddy Garden this weekend.


Friday morning we planted the remaining daylilies in the garden bed along the driveway. Next we removed all of the annuals from the garden bed in front of the Cuddy house and took apart the hanging baskets in the courtyard. We spent most of the day cleaning up the garden in front of the hatchery. We removed all of the annuals, weeded, cultivated, edged, and removed the cannas. The cannas were brought into the garden shed for the winter in flats lined in burlap.


On Saturday we finished up cleaning the front garden bed with finishing touches on the edges and raking up debris. Next we cultivated, raked, and weeded the garden bed in front of the Cuddy offices. We also removed all annuals from the garden bed. Wedding photographs were being taken at the rock garden so we cleaned up the fallen leaves. Near the end of the day, we removed any Kentucky Coffee Tree suckers from the front garden bed.


We began by scraping the debris by the curb edge at the entrance and power blew any soil away. We also power blew all of the hardscapes from any leaves and debris. We then took all the bigger sticks that were piled in the compost and piled them by the parking lot with the other broken sticks. We then went back to the front garden bed by the hatchery and removed any weeds unattended to the first two days.


Plant Profile

A plant we learned was Astilbe chinensis.

Common name: False Spirea

Family: Saxifragaceae

USDA Hardiness: 4-8

Canadian Hardiness Zone: 5

Height: 30 – 100 cm

Spread: 25 – 50 cm

Flower: The flower is thin and comes to a point. It is violet in colour and blooms late summer.

Leaf: Dark green leaves with medium texture.

Bark: Green stems

Colour: Dark green

Fruit: The fruit is not ornamentally significant

Propagation: Divisions

Habitat: Astilbe chinensis is native to China.

Shape: Mound

Growth: Moderate

Cultivation: Plant in well drained soils in full sun to part shade.

Pest: Black vine weevil and Tarnished plant bug.

Diseases: Powdery mildew and cercospora leaf spot

Notable Specimens: A.M. Cuddy Gardens, Strathroy, Ontario

Monday, October 1, 2012

Fall in the garden

Maintenance Practical Sept 28th-30th


Hello Everyone! Stacy and Elissa here at Cuddy Gardens in Strathroy.

With the cold weather coming, it was time to dig up the Dahlias, Cannas, Colocasias and Brugmansias for winter storage. We are keeping them in bulb crates with nursery mix through the winter in hopes they won’t dry out too much. The students later in the semester will spritz with water periodically. We weeded and then added a heavy layer of manure which will be tilled into the soil in spring.


Before

After


We were lucky to attend the Re-Forest London Veteran’s Memorial Parkway Tree planting day. There were 250 volunteers, including both first and second year Fanshawe Students that planted 250 trees along the parkway. Thanks to the London Cakery for the cake!


Students with a newly planted maple

Students and community volunteers busy planting


After tree planting we did some garden maintenance on campus where we talked with some photographers who were interested in the plants in the garden. They took many pictures of the plants there. They were excited to get information about the plants as well.


Photographing Photographers


On Sunday we were back at Cuddy’s doing the gardens. The vines were pruned back from the driveway and weeds removed to make the garden look nice again.


Redefining edges

A plant we learned about was Viburnum nudum ‘Winterthur’

Common name: Smooth Witherod

Family: ADOXACEAE

USDA Hardiness: 5-9

Canadian Hardiness Zone: 6

Height: 1.5 – 3.6 m (5-12 ft)

Spread: 1.5 – 3.6 m (5-12 ft)

Flower: Clustered white flower with flat top, May to late June, Fragrant, 5 cm – 12.5 cm (2-5”)

Leaf: Glossy green smooth leaves during spring and summer, turning dark reddish purple in autumn.

Bark: Smooth bark that is greyish brown. Good for winter interest.

Colour: Reddish purple leaves in autumn, colourful fruit, white flowers.

Fruit: The fruit is appealing to look at, and is also edible. Starts white changing to hot pink then red to blue. Fruit ripens in September and is black in colour.

Propagation: Propagate by softwood cuttings in spring, semi hardwood cuttings in fall.

Habitat: Native to eastern and southern United States of America. Ranges from Florida to Louisiana in understory wet areas including bogs.

Shape: Upright deciduous shrub with a rounded form.

Growth: Moderate growth

Cultivation: Full sun to Partial shade, Plant in moist but well drained soil.

Pest: No serious pest problems.

Notable Specimens: A.M. Cuddy Gardens, Strathroy, Ontario


Viburnum nudum 'Winterthur' showing gorgeous fall colour


Sources


Missouri Botanical Garden. Viburnum nudum ‘Winterthur’. Web. September 29. 2012

British Columbia Arboretum. Viburnum nudum ‘Winterthur’. Web. September 29.2012

Classic Viburnums. Viburnum nudum ‘Winterthur’. Web. September 29. 2012

Winter preparations in the nursery

Winter preparation at the Cuddy Garden greenhouse


Bill Nichols and Nate Mckim

With the autumn season underway and the cold winter months fast approaching, preparation for the season to come is very important in any garden scenario and here at the Cuddy garden, we make all possible efforts to ensure sure we’re fully prepared for winter and to assist in next year’s growing efforts. This past weekend Bill Nichols and I engaged in several activities around the Cuddy gardens and Fanshawe Collage Campus, primarily at the micro nursery of Cuddy’s, to aid in these preparation efforts.

Colocassias ready to dry down for the winter
The majority of Friday was devoted to the annual planters at Cuddy’s. Most of the plants had begun to show frost damage so we started scraping all the plants except for various tender, desirable plants such as Colocasia’s and Pennisetum’s to be saved and potted up for winter storage. That afternoon we devoted the rest of our day to general greenhouse tasks such as potting up any remaining rooted cutting taken over the summer, adjusting media levels in shallow pots, baiting all the rodent stations with rodenticide and some final annual propagation.


Some tender sedges and ornamental grasses ready for cool storage


Wax bait to control voles and mice in the cold frames

A simple and effective bait station made of ABS pipe


The propagation deserves special mention due to how often it is used around here as a way of continuously not having to purchase new plants on a yearly basis for our collection. The cuttings are taken and treated with a 0.3 IBA rooting gel and placed in “Jiffy” peat cubes that have been previously filled with a mix of 50% promix HP and 50% pearlite for the extra drainage required for the rooting process. The cuttings are then placed inside the misting chamber to provide them with adequate moisture until they root and are able to better fend for themselves. The plants we were focusing on taking cuttings from were; Plectranthus variegate and a Brugmansia of an unknown species which will hopefully develop strong roots before the weather gets too cold.


Jiffy pots, great for a wide range of cuttings

Cutting mix

On Saturday we were called back to main campus to assist in assembling heat mats for the greenhouse. On campus they are also very busy digging up tender plants from around the grounds to be potted up for winter storage and the heat mats assist in providing the recently dug up plants with a favorable root zone temperature.


On Sunday we were back at Cuddy’s devoting most of the day to propagation by crown division of Calamagrostis acutiflora ‘karl foerster’. We potted the divided plants in a mix of 4 parts grow bark to 1 part promix to ensure all the necessary nutrients. With what time was left we did some general house cleaning and space consolidation in the greenhouse. These tasks are important to ensure a productive and safe work environment.


Perennial potting mix
Perennial divisions


Signing off for now, Good luck with your own winter preparation!


Nate and Bill


Monday, September 24, 2012

Denise's Weekend Practical

Hi everyone Denise here


As you guys may know I was here last weekend on my Landscape and Maintenance practical. This weekend I had my Greenhouse Plant Production practical here at Cuddys. This weekend is full of interesting things.

Beginning of the weekend was a little hectic because I had to print out all the plant labels for Iris siberica, Lazula syvatica, Rhodotypos scandens, Calamagrostis x acutiflora 'Karl Forester', Hemerocallis x ‘Stella de Oro’, Pulmonaria x Lungwort, Miscanthus sinensis, Miscanthus sinensis ‘Variegata’, Sedum x Autumn Joy, Euphorbia polychroma, and last but certainly not least, Calamagrostis x acutiflora ‘Overdam’. We had a class here on Wednesday and potted a whole bunch of Iris’s and multiple types of grasses, unfortunately that day we didn’t have use of the label machine so that was my duty on Friday to print and distribute all the labels to the desired plants. The picture below has some of the plants that I labelled, including Iris siberica.


Saturday September 21

Although it was a chilly day, I enjoyed working and being productive. I started off the day with turning on the irrigation to water plants in the hoop house, and turn on the irrigation for the plants outside. Even though it rained, it was still not enough to satisfy them. I then moved on to finishing up with all the labels and moved on to the Arundo donax, which is Giant Reed Grass. I needed to cut back the grass, and do some re potting into smaller pots because there was a mixture of sizes and I wanted it to be unison. Once I was done that I had to move them into the coldframe to begin to harden them off.


Steps to why we put plants into the coldframe.

1st Hardening off the plants for fall acclimation, we withhold fertilizer and let the plant dry down between irrigation.

2nd We then compact the plants inside the cold frame, and place the bate in the bate station. It is designed that kids or pests do not get into the bate. It also keeps the bate dry to allow for rebating when necessary.


3rd Early to mid-November when plants harden off we cover the coldframe with Opaque Nursery Film.


We then make sure plants are watered at field capacity prior to freeze up. The reason to why we arrange the plants in plant type and pot size is so we can apply culture to the plants as needs. Different plants of course need different amounts of water, so if we were to have a mixture of plant types together, with smaller plants in small pots they will either get too much water or not enough.


Later that afternoon I turned the irrigation back on, because I only had it on for 2 hours in the early morning, and the sun surprised me and came out for a while so I it was time for the plants to have a little drink. I began to move some of the Sedum Autumn Joy, and Karl Forester Grass to the hoop house to do some divisions. They get repotted from a 3 gallon pot to a 1 gallon pot and are now in the hoop house for overwintering. When I say division I don’t mean math by any means, what I do mean is I had to cut back the grass and the sedum flowers and then remove them from the pots and cut them in half. From there I just re potted them then placed them in the hoop house. The picture below is a division of Sedum x Autumn Joy.


Sunday came, and it happened rather fast. But the plan for my day was to do the best that I could and finish off what divisions I had done, and to re pot the Rhodotypos scanden which is Black Jetbead. This plant is in the propagation chamber with other little plants, there were only about 12 of them and I repotted them in 1 gallon pots, but because they are small I put 3 plants per pot.

At the end of the day, it is time to clean and organize. I moved a lot of pots around, did a big sweep of the hoop house. All in all it was yet another great and eventful weekend.

Denise